Welcome to taosastronomer.com!
offering
local "hands-on" observing
(visual and imaging) sessions and instruction
viewing and imaging from Rabbit Valley Observatory
a dark sky location on the mesa just west of Taos, NM
Re-creation of the video/visual observing session (original session April 19, 2019 -- re-creation April 26-27, 2019) |
Original session April 19, 2019 Willis, Emily Brett and fiancé Keith from England The original observing/video session is detailed in a previous log -- this log concerns the "re-creation" of their session, both for me to learn more about the software, and also to acquire some images to further "visualize" their experience and to send along to them.
equipment: |
The night of April 26 was clear and calm. I opened the observatory, hooked up everything and aligned the mount from the west side of the pier and toward Sirius. Using Sirius and its star-filled FOV, I focused the Atik Infinity, and centered using the convenient green crosshairs and then initialized the DSC's. The first object was M42. The DSC's got close, but not right on. This indicates that at a future time I need to "tweak" the polar alignment. I reinitialized the DSC's ("warp = 0") and began to image the setting nebula. I tried a lot of software toggles, and finally came upon a good exposure (I believe exposure = 30 seconds, binning (color) = 1, effective f/l ~ 952 divided by 2 = 476 (f/3.75), FOV indicator in AstroPlanner used for estimate of view.) I clicked the record button to attempt to record the session, and at the end saved the final stacked image as well, employing the toggle "unprocessed." Details learned here include making sure to set up before-time folders for saving and playback (2 different folders!). I didn’t do this (and further complicated the process by moving the created folder later), and so only had the unprocessed images to work with. More below after the images as to the next-day post-processing. |
So, below is the image (post-processed the next day) of M42, the Orion Nebula: |
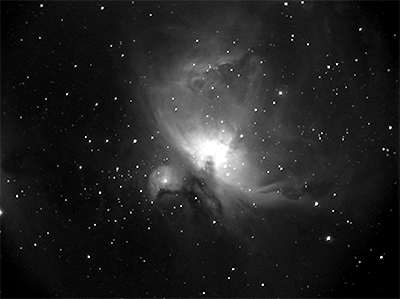 |
The image has been converted to B&W (color rendering of this Atik Infinity camera is fair at best, and the image has been post-processed both in CCDStack2 (DDP and deconvolution) and then moved to Photoshop on the Mac for levels (drop-down menus), etc. I post-processed crudely and quickly to kind-of duplicate what I might do for future guests. I'm quite pleased with the result. Click this text to compare this image to my latest M42 high-resolution photograph, taken through the ES127ED refractor and employing the Canon XSi DSLR. The next object I tried was M41, but was unsuccessful in aiming it up. This is due partially from the small size of the chip, but mostly because the polar alignment needs a "tweak," as above, especially since I was so close-by. |
I moved on to M37 in Auriga, and the resultant color image is below. The save process and transfer for this image was similar to M42. |
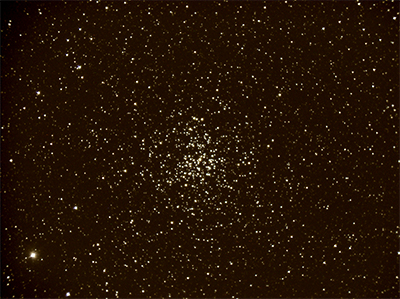 |
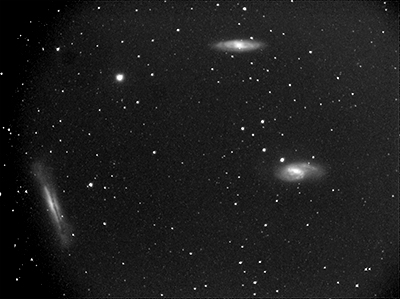
Here the color seems OK, although that brownish-magenta background is a bit disturbing. One thing that is obvious is that the stacking routine contained in this software is superb, especially considering that the mount wasn't following all that well. Note the smallness and roundness of the stars. Very good! I then moved over to the Leo triplet of galaxies. Emily, Keith and I were unable to find them, but, because I was now more familiar with the setup, I did find them, and, after crudely centering by using a highly-binned quick exposure, centered them exactly to my satisfaction. I began to image, but had to stop soon, "reload" and try again. The reason was twofold: 1 -- Some clouds apparently came over and initially degraded the image. 2 -- I noticed first that the dome was a bit in the way, and then after moving it and starting over with the 30-second exposures, I noted that the optics were creating a rather vignetted image. This was probably true with the previous subjects, but wasn't as noticeable. As a result, I cropped the final image a bit, converted it to B&W and post-processed pretty much as before. |
Image of the Leo Triplet of galaxies (M65/M66/NGC3628) -- link here to a higher resolution shot taken with the Canon 450D XSi DSLR through the 80mm WO refractor. |
 |
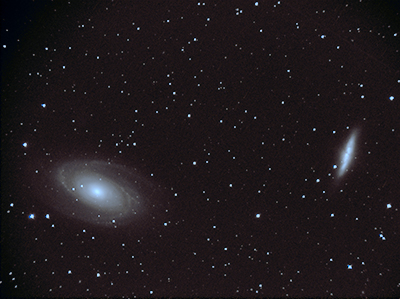
The next subject was M81/M82. During Emily and Keith's session, we saw the edge of M81 but I was unable to center it. This time there was no problem, and really the process of imaging went very smoothly. Also, after running it through CCDStack2 and bringing it into the Mac, I was able to rid the background of errant color -- I'm really quite happy with this image. Additional comments for all images below this log narrative. |
Image below of galaxies M81 and M82 in Ursa Major-- link here to a higher resolution shot taken with the Canon 450D XSi DSLR through the 80mm WO refractor. |
 |
The final subject of the session would be M51, the Whirlpool galaxy. This was also the final object in the session with Emily and Keith, and was a fitting and spectacular conclusion to the night. Here everything went well at first, but I noticed the rejection of many images in the stack. This was due to clouds coming over, and not to focus degradation -- during this follow-up session I did refocus once (just before M81/M82), which helped immensely. I used all of the tools within the simple software, and employed the electric focuser as well. Results were excellent. |
Image below of galaxies M51 (and companion galaxy NGC 5195) in Canes Venatici -- link here to a higher resolution shot taken with the Canon 450D XSi DSLR through the 80mm WO refractor. |
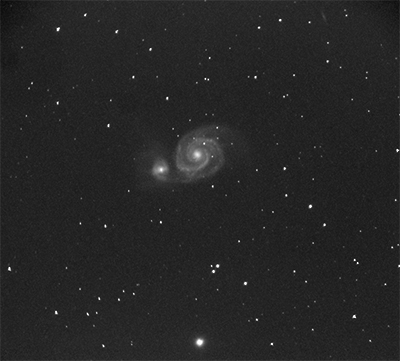 |
Post-processing of this image was difficult, as I had to retrieve only part (only five images) of the saved stack before restacking in DSS and additional post-processing in CCDStack2. Also, of course, I converted to B&W. After this image acquisition, I closed up and came inside. Further comments: To be blunt, this process of video observing is perhaps more enjoyable (and certainly more productive and "savable") than just using eyepieces. I thought I would never say it, but "video killed the (not radio but visual) star." Visual astronomy is dying.
Webmaster's note: This log compilation is typical of every observing session, whether visual, video or photographic. Otherwise, I'd likely forget the details of all of the wonderful experiences I've had under the beautiful dark skies of northern New Mexico!
|
(all content copyright 2015-2019 Willis Greiner Photography, all rights reserved)